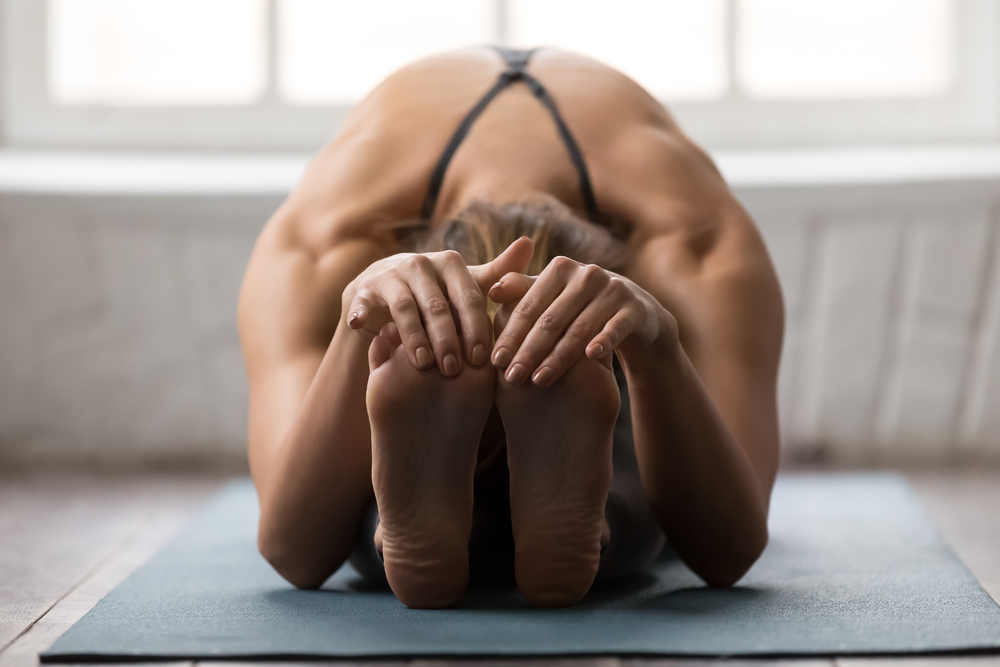
Today more than ever, we need to take care of our immune systems. Read further for my favorite yoga sequence for immunity boost and stress-management.
The immune system protects the body against diseases or outside intruders such as bacteria, viruses, and parasites. When the immune system functions perfectly, it identifies and fights the trouble makers, like fungi, viruses, bacteria, and toxins, and distinguishes them from the body’s healthy tissue.
Yoga is known to be one of the most effective natural immunity boosters. Research shows that yoga can help boost the immune system and decrease inflammation in the body.
The World Health Organization describes yoga as a valuable tool that increases physical strength and mental well-being. Yoga is not only a very effective technique for promoting health, it is equally effective as a preventative tool in maintaining good health.
Regular Practice of yoga can effectively:
- lower your stress hormones
- strengthen the nervous system
- stimulate the lymphatic system
- remove toxins from the body
- reduce anxiety
- calm the mind
- enhance the quality of sleep
And a good night’s sleep is your best friend when it comes to maintaining a healthy immune system. Here I describe my favorite yoga sequence for immunity boost and stress-management.
First | Yoga sequence for immunity boost and stress-management
Start with three rounds of Bhastrika Pranayama, twenty counts each with thirty seconds rest in between.
Second | Yoga sequence for immunity boost and stress-management
Choose at least five from the below-listed asanas.
1. Cat Pose
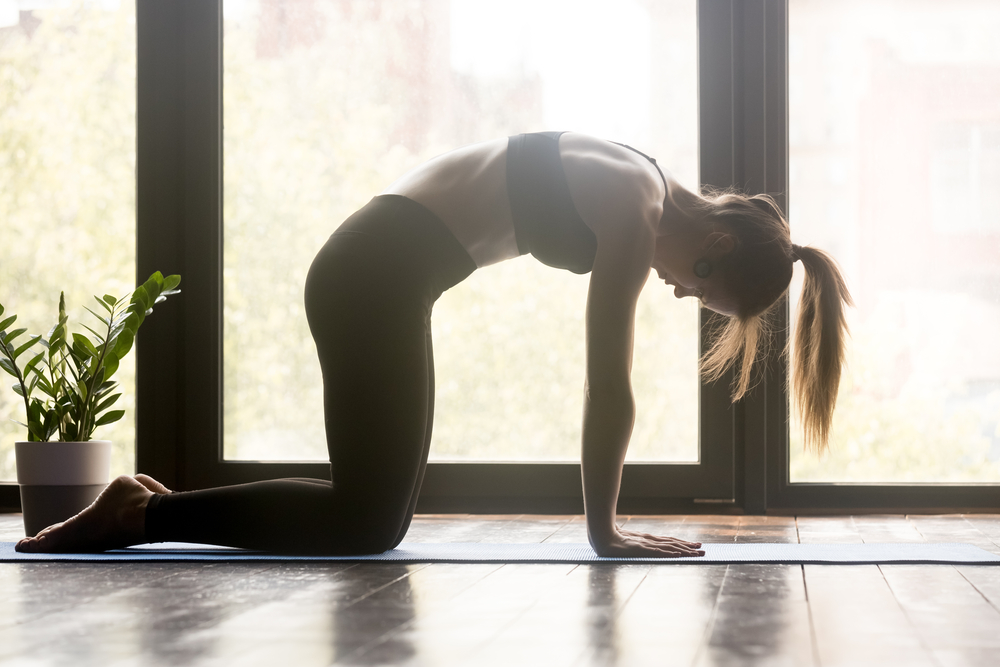
Duration: 1 minute
INSTRUCTIONS:
- To start, come on your hands and knees in a table position.
- Keep your hands shoulder-width apart and your knees hip-width apart.
- Your wrists should be under your shoulders in one straight line
- As you breathe in, take your chin and chest forward and up and lookup
- As you raise your tail bone towards the ceiling, press your navel towards the floor
- As you breathe out, bring your chin to the chest
- Arch your back and press your chin to your chest and straighten your arms
- Repeat this about 5 to 10 times, coordinating with the breath.
- Make sure your elbows remain unlocked, and you don’t bend your arms with the movement
- Keep your fingers spread out
- Once you’ve mastered this pose, you may keep your eyes closed
2. Childs Pose
Duration: 1 minute
INSTRUCTIONS:
- To start, sit on your heels.
- Keep your hips on the heels, bend forward and bring your forehead to the floor.
- Keep your arms beside your body, elbows slightly bent and palms facing up.
- Gently press your chest on your thighs.
- Stay here and relax.
- Take long, deep breaths in and out.
- Slowly come up vertebra by vertebra, sit on your heels, and relax here for a few seconds.
3. Standing forward bend
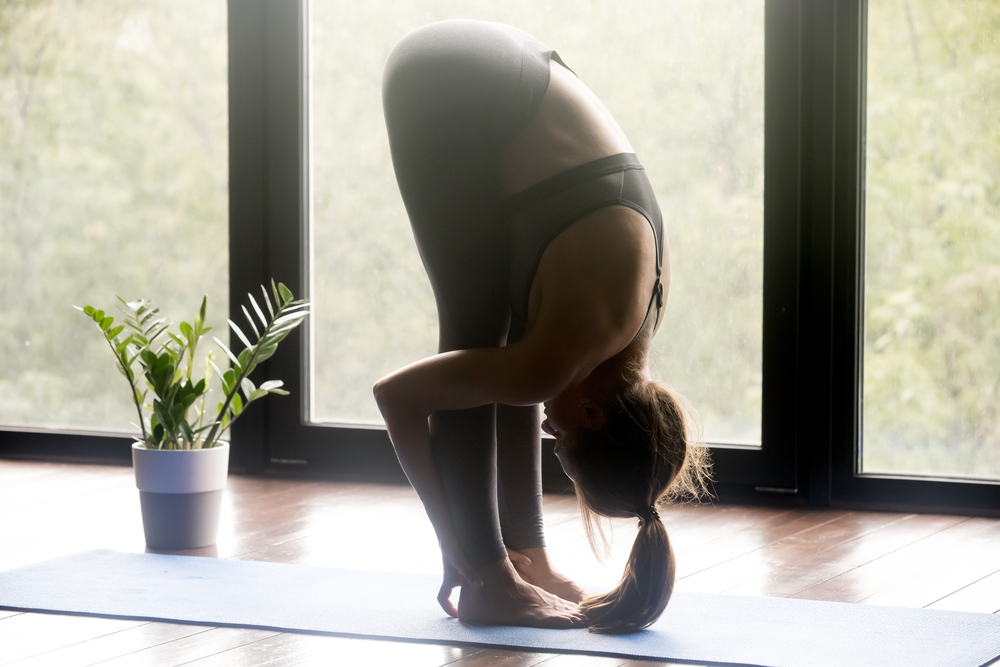
Duration: 1 minute
INSTRUCTIONS:
- To start, stand straight with your feet together or hip-width apart and your arms beside your body.
- Balance your weight equally on both feet.
- As you breathe in, extend your arms over your head.
- And as you breathe out, bend forward from your hips down towards your feet.
- Stay here for 20-30 seconds and continue to breathe deeply.
- Keep your legs and spine straight.
- Rest your hands either on the floor, on your legs, or ankles.
- As you breathe out, move your chest towards your knees
- Lift your hips and tailbone up
- Press your feet into the floor
- Relax your head and move it gently towards the feet.
- Keep breathing deeply.
- As you breathe in, stretch your arms forward and up and slowly come back up to the standing position.
- As you breathe out, bring your arms to the side of your body.
In standing forward bend, you stretch all the muscles of the back of your body. This pose increases the flow of blood and stimulates the nervous system. And it tones all the abdominal organs.
You may avoid this pose if you suffer from back conditions such as Sciatica, Slip disk, or Cervical, or if you have high blood pressure, heart conditions, or vertigo, or any abdominal hernia or ulcer.
4. Half spinal twist
Duration: 2 minutes
INSTRUCTIONS:
- Sit in Dandasana
- Place your left foot outside the right knee
- Bend your right leg and bring your right foot beside your left hip
- Lift your left arm, open your shoulders and place your left hand behind your back with your palms flat on the floor.
- Cross your right arm over your left knee and hold your left ankle.
- Twist your shoulders to the left
- Looks over your left shoulder as far as you can, keeping your spine erect.
- Stay in this posture for a few breaths and breathe normally.
- As you inhale and gently come back to the center.
- Repeat the half spinal twist on the other side.
The half spinal twist is super good for posture correction, plus it increases flexibility in each vertebra of the spine, from the base of the spine to the neck. It regulates the secretion of bile and is excellent for diabetes. In addition, this pose massages the abdominal organs and helps to relieve constipation.
You may avoid the half spinal twist if you have a back or spine injury, suffer from sciatica or a slipped disc, have recent abdominal surgery, diarrhea, ulcers, or advanced stages of pregnancy.
5. Seated forward bend
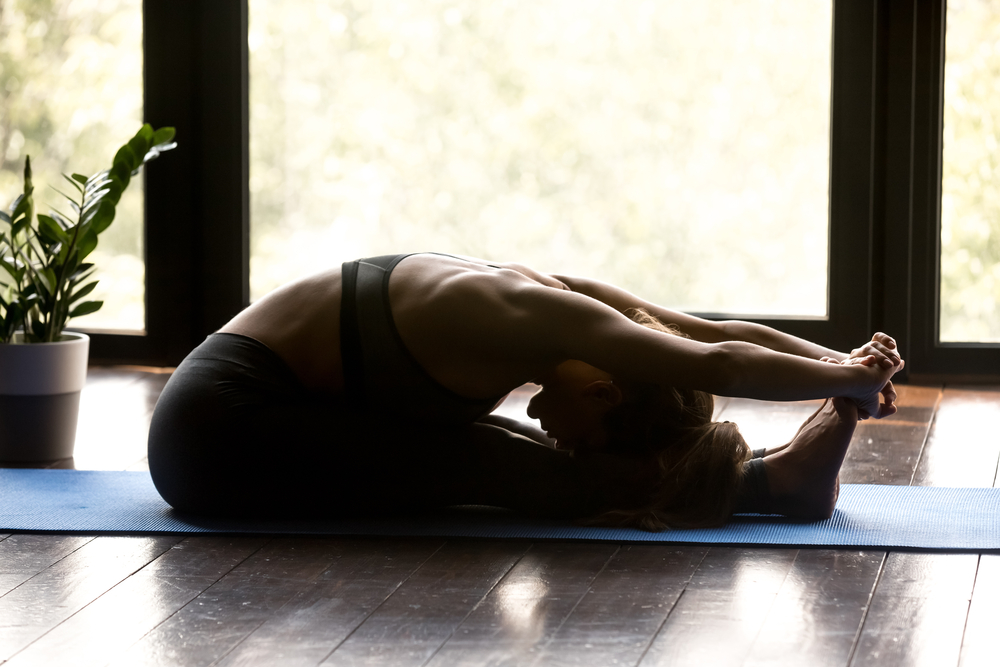
Duration: 1 minute
INSTRUCTIONS:
- Sit on the floor with your legs stretched out, toes pointing towards the ceiling.
- Make sure your knees and feet are together and gently place your hands on your knees.
- As you breathe in, raise both your arms up and stretch your spine.
- And as you breathe out, slowly and gently bend forward from your hips, and stretch your hands.
- Keep your spine stretched and slowly bring your chest to your thighs and focus on moving forward towards the toes, rather than trying to touch the forehead to the knees.
- Place your hands on your legs, your ankles, or any part of the legs that you can comfortably reach.
- If you are flexible, grab your toes and pull on to them so you can go deeper into the pose.
- Your arms should be parallel to your lower legs and your elbows touching the floor.
- As you breathe in, gently lengthen your spine.
- As you breathe out, gently move your navel towards the knees and hold this position.
- Hold it for as long as it is comfortable for you.
- Stretch the arms out in front.
- Breathe in and bring yourself back up into the sitting position
- Breathe out and relax your hands
The seated forward bend stretches the spine and makes it flexible. It helps to increase your height if you are still young and growing. It massages and tones the abdominal-pelvic organs, including the liver, pancreas, spleen, kidneys, and adrenal glands. It is superb for women after delivery. A regular Practice of the seated forward bend cures impotence and enhances sexual appetite.
You may avoid the seated forward bend if you suffer from a slipped or herniated disc or sciatica. If you have diarrhea, painful and enlarged liver and spleen, appendicitis, and asthma.
You may place a thin blanket underneath your tail bone and or knees if they hurt.
6. Cobra Pose
Duration: 1 minute
INSTRUCTIONS:
- Lie down on your stomach with your toes pointing outwards and your forehead resting on the floor.
- Place your palms flat on the floor, fingers pointing forward, under the shoulders, elbows close and parallel to the torso.
- Relax your lower back
- Take a deep breath in, tightening the booty, and slowly raise your head, neck, and shoulders.
- Using the strength of your back muscles, raise your chest until your body is resting on the pelvic bone.
- Gently tilt your head up and look towards the ceiling.
- Move your shoulders away and down from the ears.
- Take a few deep breaths in this pose.
- As you exhale, slowly bring your head forward, lower your chest, shoulders, and finally rest your forehead on the floor.
- Relax your lower back muscles
The cobra pose brings flexibility to the upper back. It opens the chest, improves breathing, and relieves breath-related disorders. In addition, it tones the liver, massages the kidneys, liver, pancreas, adrenal glands, and reproductive organs.
You may avoid the cobra pose if you suffer from a hernia, peptic ulcers, abdominal surgery, herniated lower back, degeneration or spinal misalignment of the lower back, intestinal tuberculosis, or spinal disorders. And also if you are pregnant or have carpal tunnel syndrome.
7. Bridge Pose
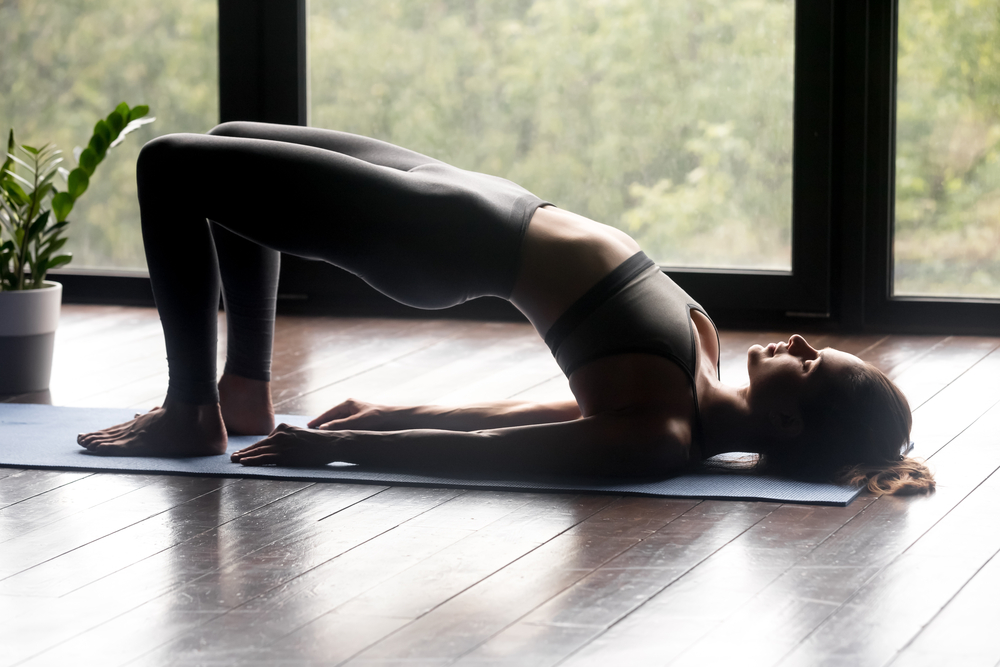
Duration: 1 minute
INSTRUCTIONS:
- Lie down on your back.
- Fold your knees and keep your feet hip-distance apart on the floor, 10- 12 inches from your pelvis, with knees and ankles in a straight line.
- Keep your arms beside your body with your palms facing down.
- As you inhale, slowly lift your lower back, middle back, and upper back off the floor.
- Gently roll in the shoulders.
- Keep your chin relaxed and support your weight with your shoulders, arms, and feet.
- Keep breathing.
- Both your thighs should be parallel to each other and the floor.
- Exhale slowly and come out of the posture
8. Wind-relieving Pose for one and a half minute
Duration: 1 minute & 30 seconds
INSTRUCTIONS:
- Lie on your back with your feet together and your arms beside your body.
- As you breathe in, bring both your knees towards your chest and hold your knees with your palms.
- As you exhale, lift your head and chest off the floor and bring your nose in between the knees.
- Hold it there as you take long, deep breaths in and out.
- You may rock forward and back or roll from side to side 3-5 times and then relax.
- As you inhale, bring your head down.
- As you exhale, straighten your legs and relax.
The wind-relieving pose strengthens the back and abdominal muscles and eases any tension in the lower back. It massages the intestines and other organs in the abdomen. Plus, it helps in the digestion and release of gas.
You may avoid the wind-relieving pose if you are pregnant or have high blood pressure, heart problem, hyperacidity, hernia, slip disc, testicle disorder, menstruation, neck, and back-related issues.
9. Dancing Shiva Pose for 2 minutes
Duration: 2 minutes
INSTRUCTIONS:
- Lie on your back, with your feet together
- Stretch your arms away from the body in line with your shoulders with your palms facing up.
- Exhale and bend your right leg, place your right foot on your left knee
- With your left hand, gently press your right knee to the floor on the left side.
- Turn your head and look at your right palm.
- Keep both shoulders on the floor.
- Hold this pose and take long deep breaths in and out.
- Inhale, gently come back to the center.
- Relax your leg, exhale and relax.
- Repeat on the other side.
The dancing Shiva pose massages the pelvic organs and removes pain from the lower back.
You may avoid the dancing Shiva pose if you have a hernia or spinal injury.
Third | Yoga sequence for immunity boost and stress-management
Listen to Yoga Nidra, guided meditation for relaxation by Gurudev Sri Sri Ravi Shankar.
Fourth | Yoga sequence for immunity boost and stress-management
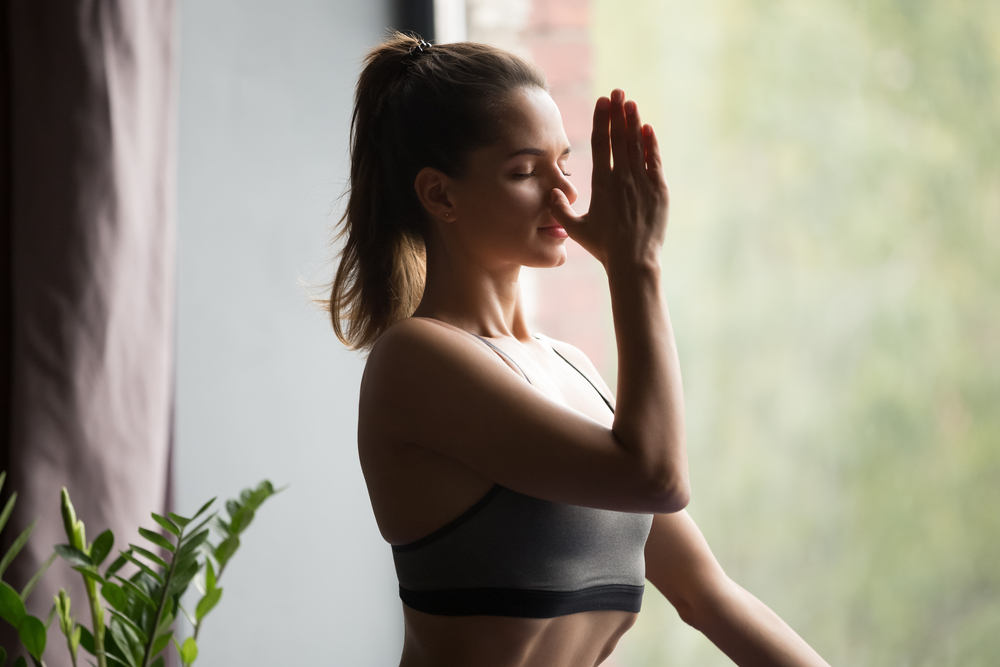
Practice around nine rounds of Nadishodhan Pranayama (Alternate Nostril Breathing) or for 2 – 5 minutes.
Summary | Yoga sequence for immunity boost and stress-management
- Three rounds of Bhastrika Pranayama, twenty counts each with thirty seconds rest in between
- Choose at least five asanas as described above
- Yoga Nidra
- End the session with nine rounds of Alternate Nostril Breathing
If you enjoyed the yoga sequence for immunity boost and stress-management, please make sure to leave us a comment below. We love to hear from you.